Using AI to implement Ideation and Illustration
We've given our website a futuristic facelift, and it's all thanks to AI!
In this blog post, we'll spill the beans on how we used Midjourney's text-to-image generator to create stunning visuals. As a software agency, we are always exploring new ways to push the boundaries of design, and using AI to build upon what we already know has been a game-changer for us, especially as a group of graduates, fresh out of university. We realised that designing for industry is nothing like the assignments we had done while studying and that we must use the tools available to us to stay ahead of the herd and create designs that are fresh and out of the box. After endlessly prompting Midjourney to generate unique and eye-catching images that perfectly suited the Retro brand we ideated and conceptualised designs. With the copious amounts of time we spent using AI throughout this project we were bound to have picked up some valuable tips that we will now share with you. So, if you're curious about how to incorporate AI into your design workflow, keep reading!
AI-Powered Ideation: Breaking through Creative Blocks
Midjourney has been an excellent tool to overcome creative block and generate new ideas quickly. Using the text-to-image generator to create multiple UI styles in the ideation phase served as mood boards to inspire different visuals and possible layouts.
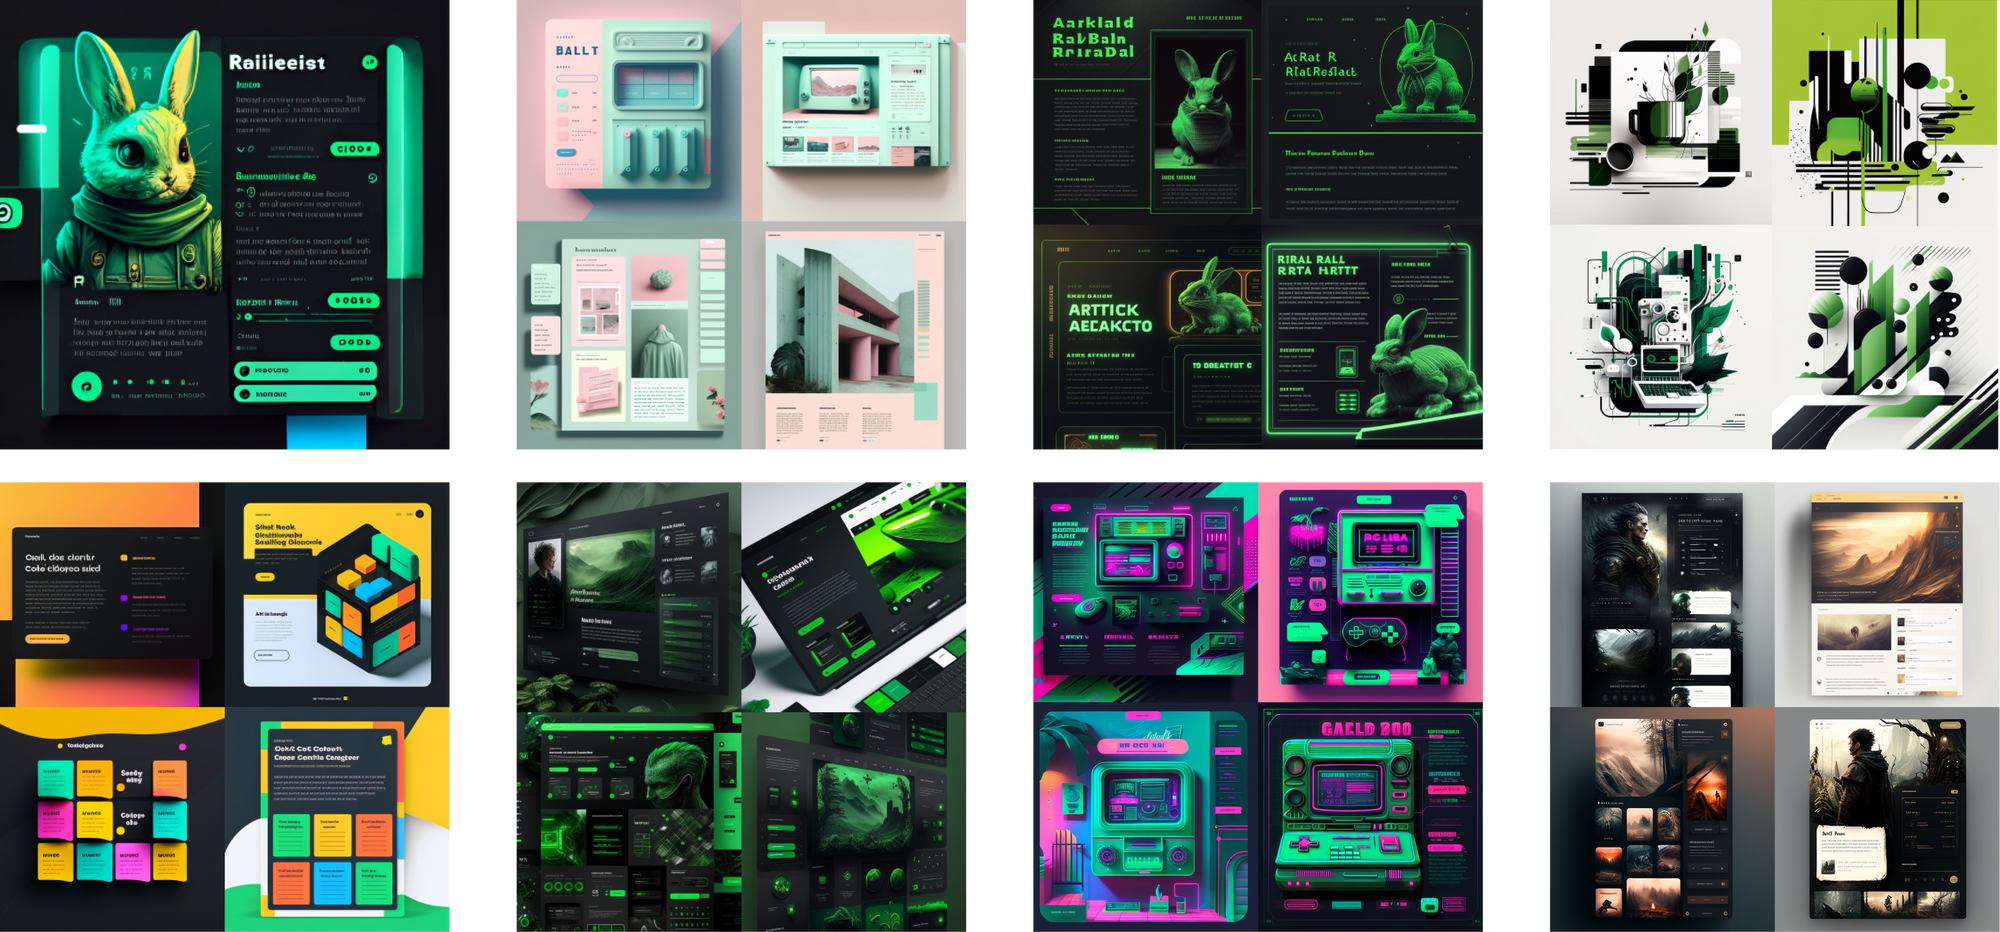
However, it's important to note that while AI-generated imagery can be a great starting point, they do not account for usability. That's why, in addition to using Midjourney, we each created various wireframes to ensure that the final product is user-friendly and intuitive. We used the generated imagery along with Retro Rabbit's style guide to develop the UI, ensuring that the design remained consistent and aligned with the brand's visual identity. The combination of AI-generated visuals and human input has allowed us to create unique and visually appealing designs that prioritise both the user experience and interface.
Our Prompt Recipe
Once we made a decision on the final design style, we turned to Midjourney again: this time, to populate the rest of our website with imagery following that style. We accomplished this in the following steps.
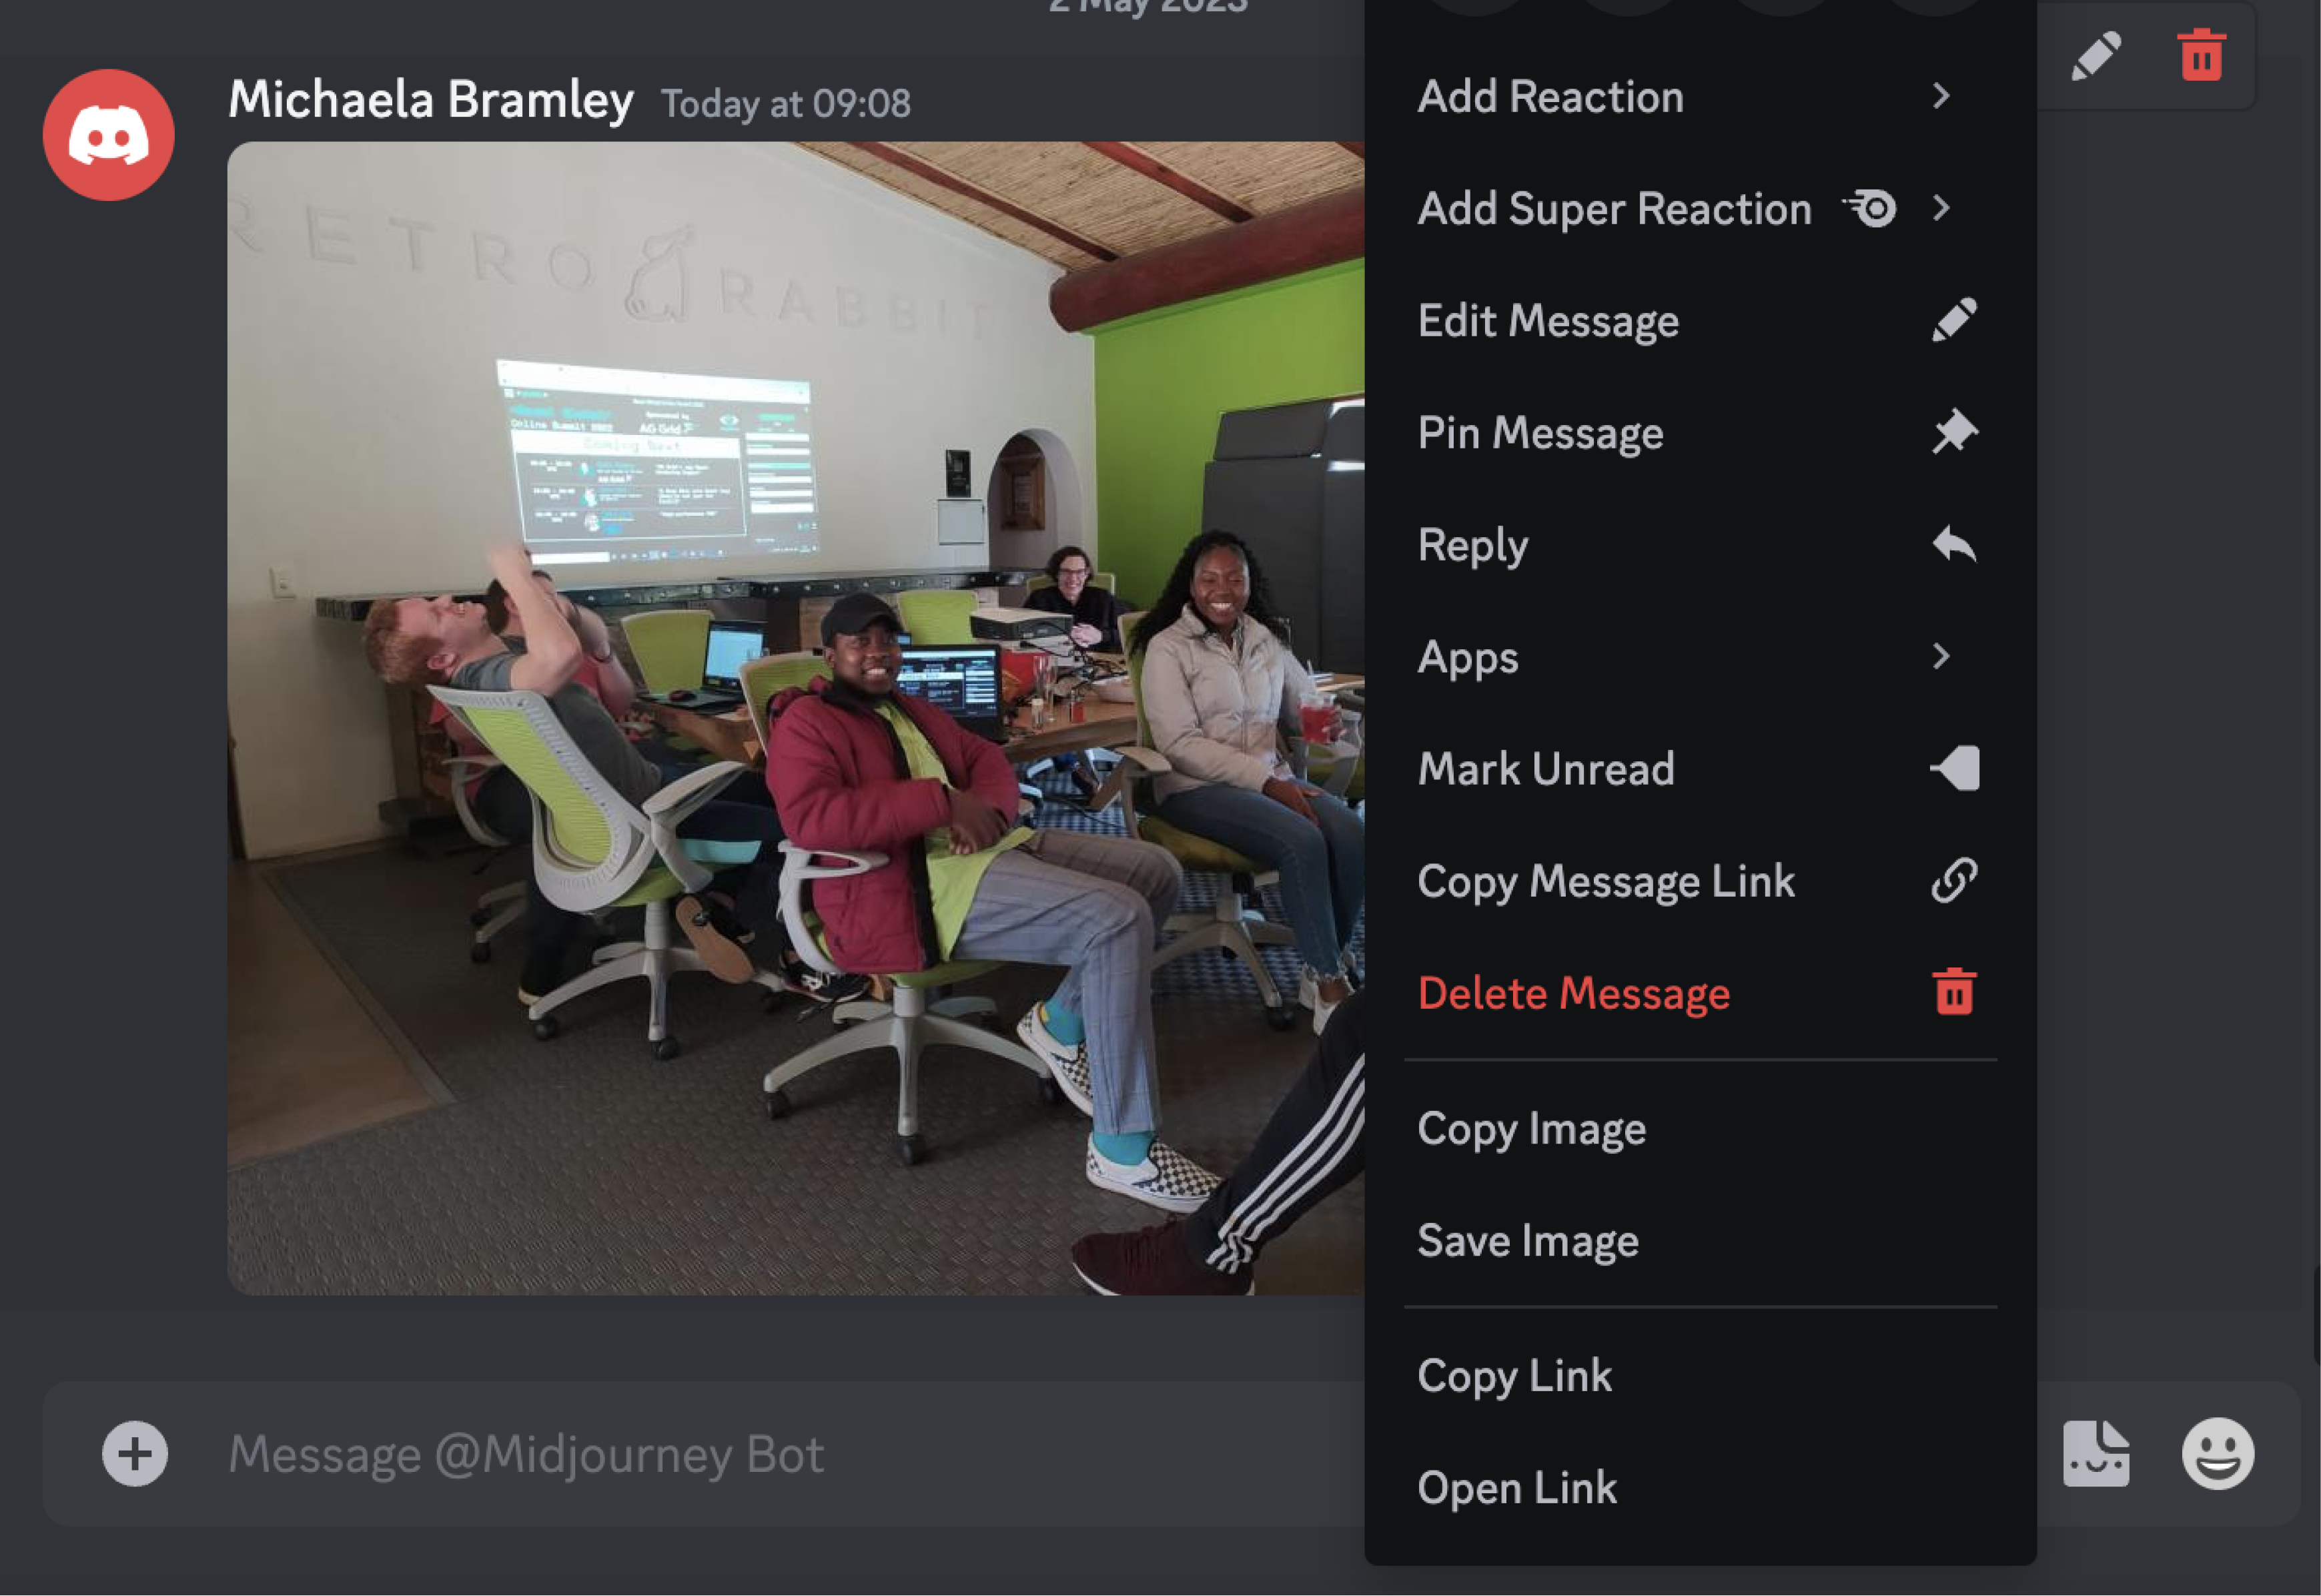
Step 1: Reference image
We used a reference image to include in the prompt. To do this, right-click on a photo online and copy the image address.
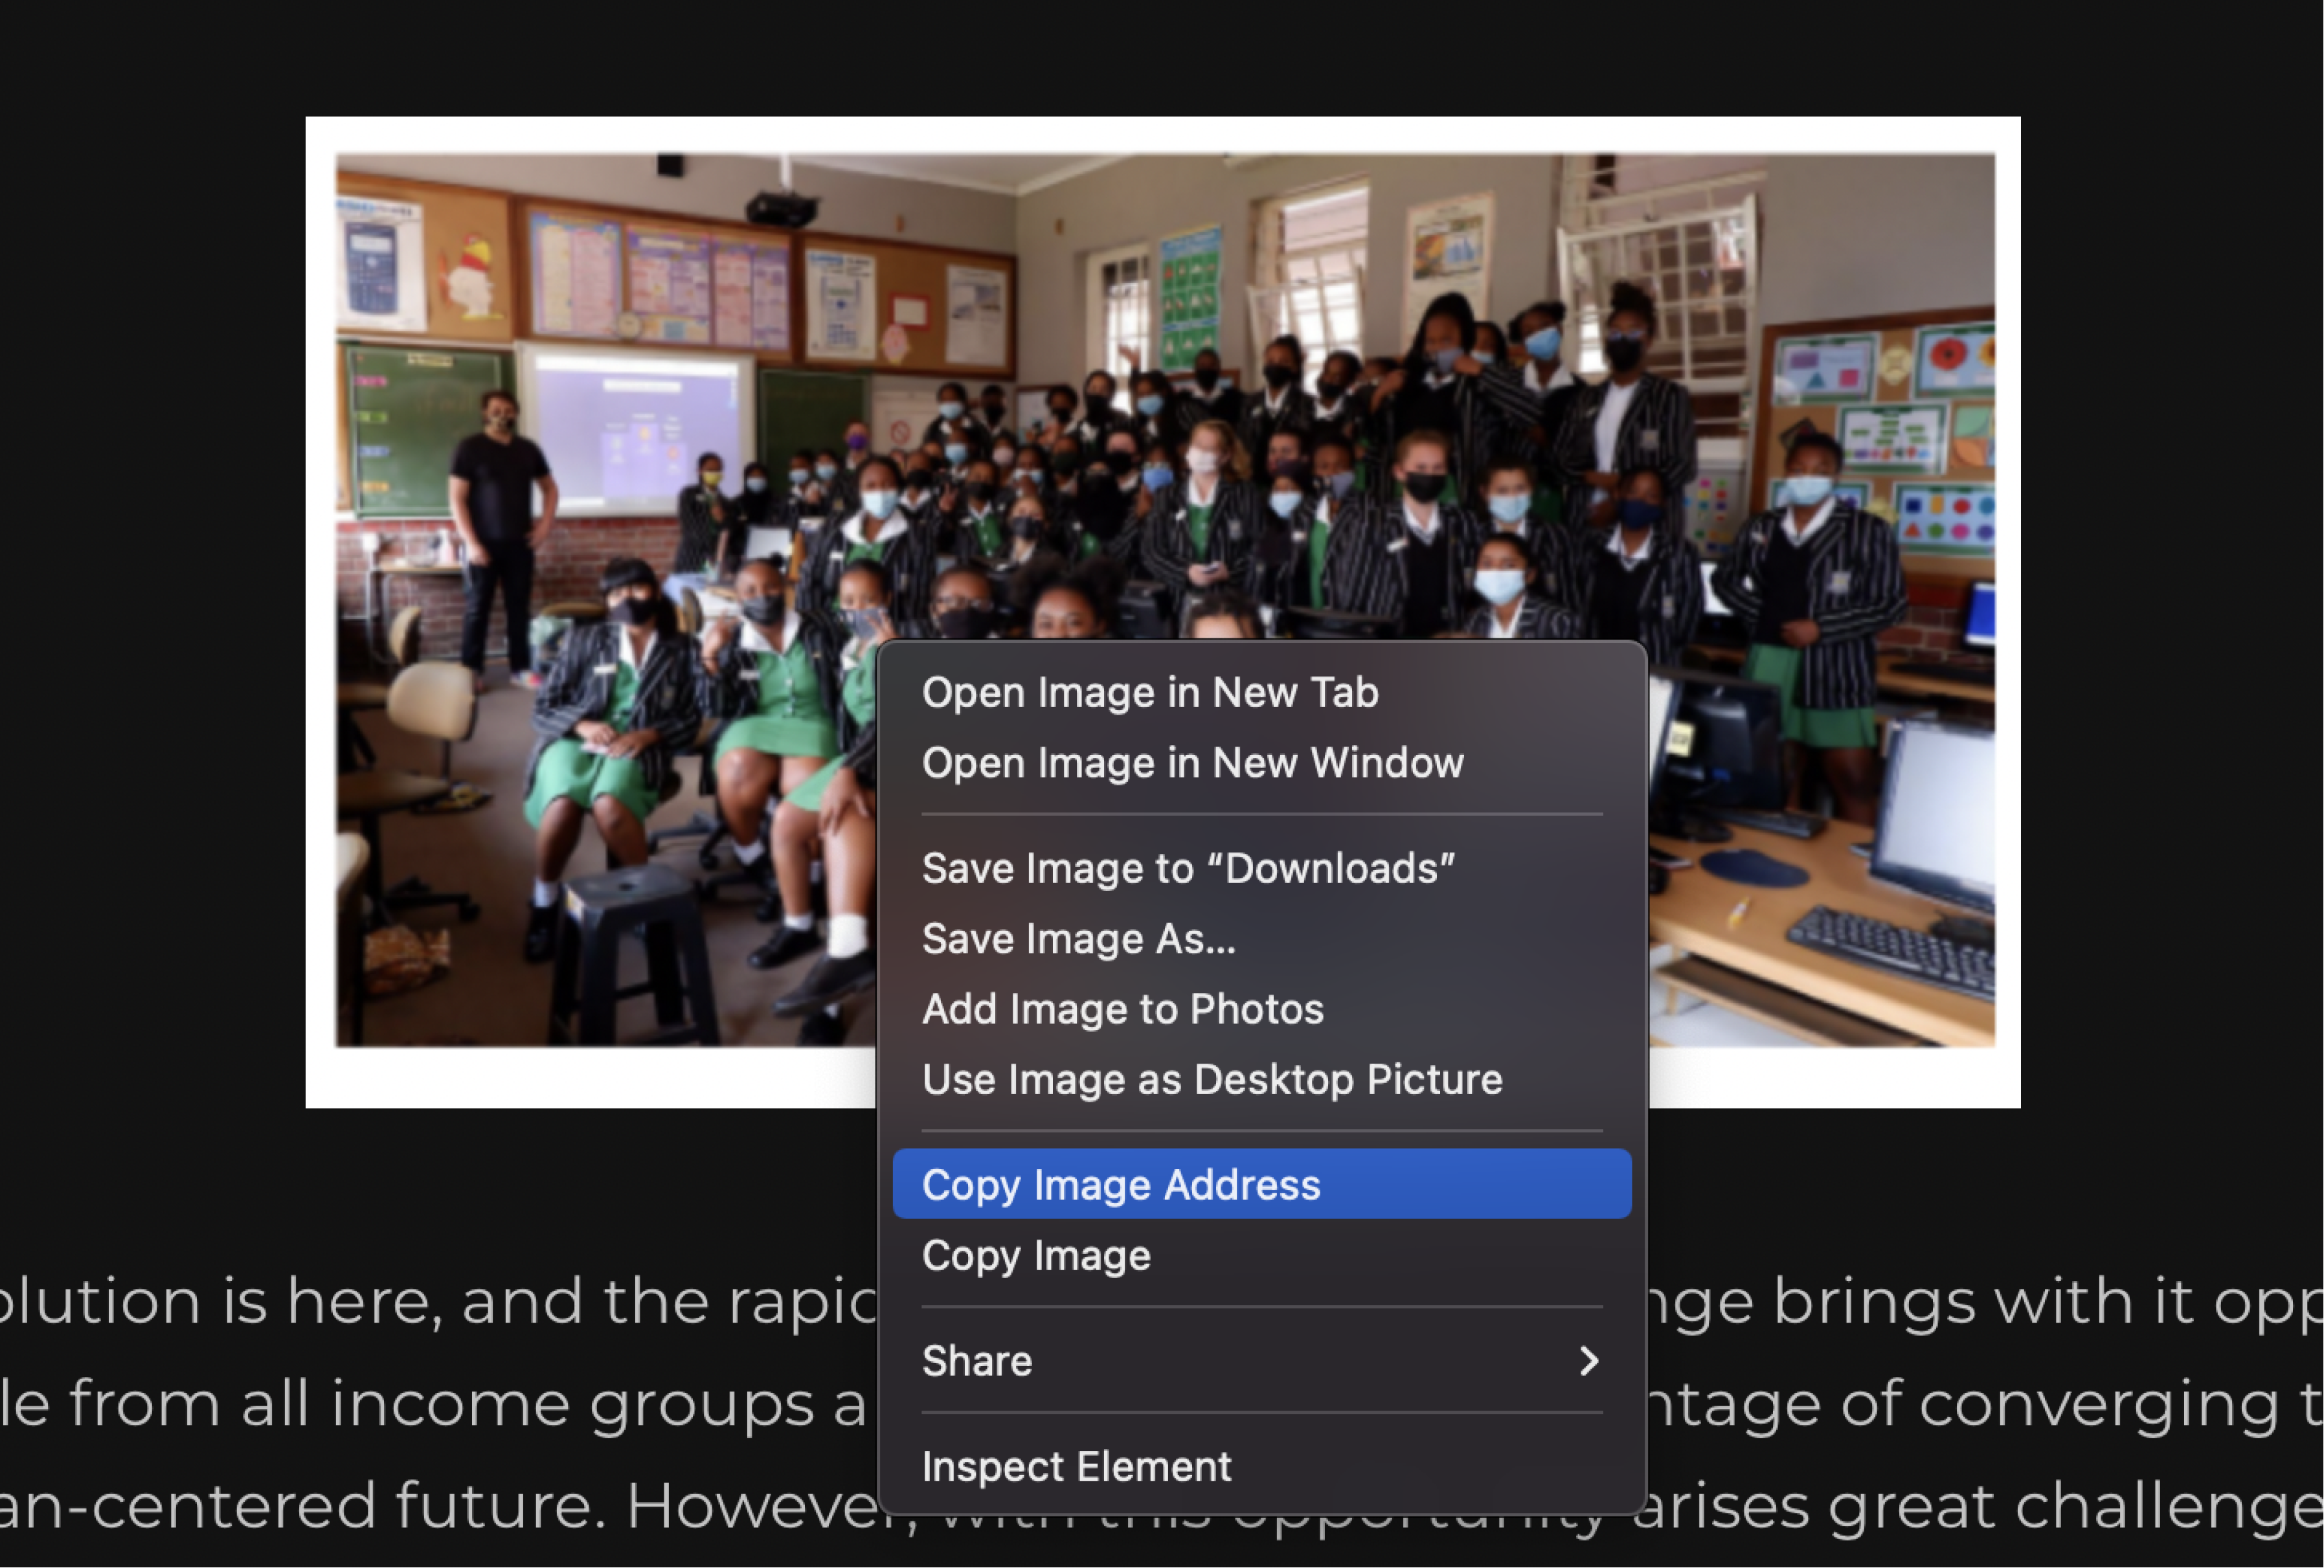
Thereafter, paste the image link straight into your prompt in the Discord chat with the Midjourney Bot or on the Midjourney channel.

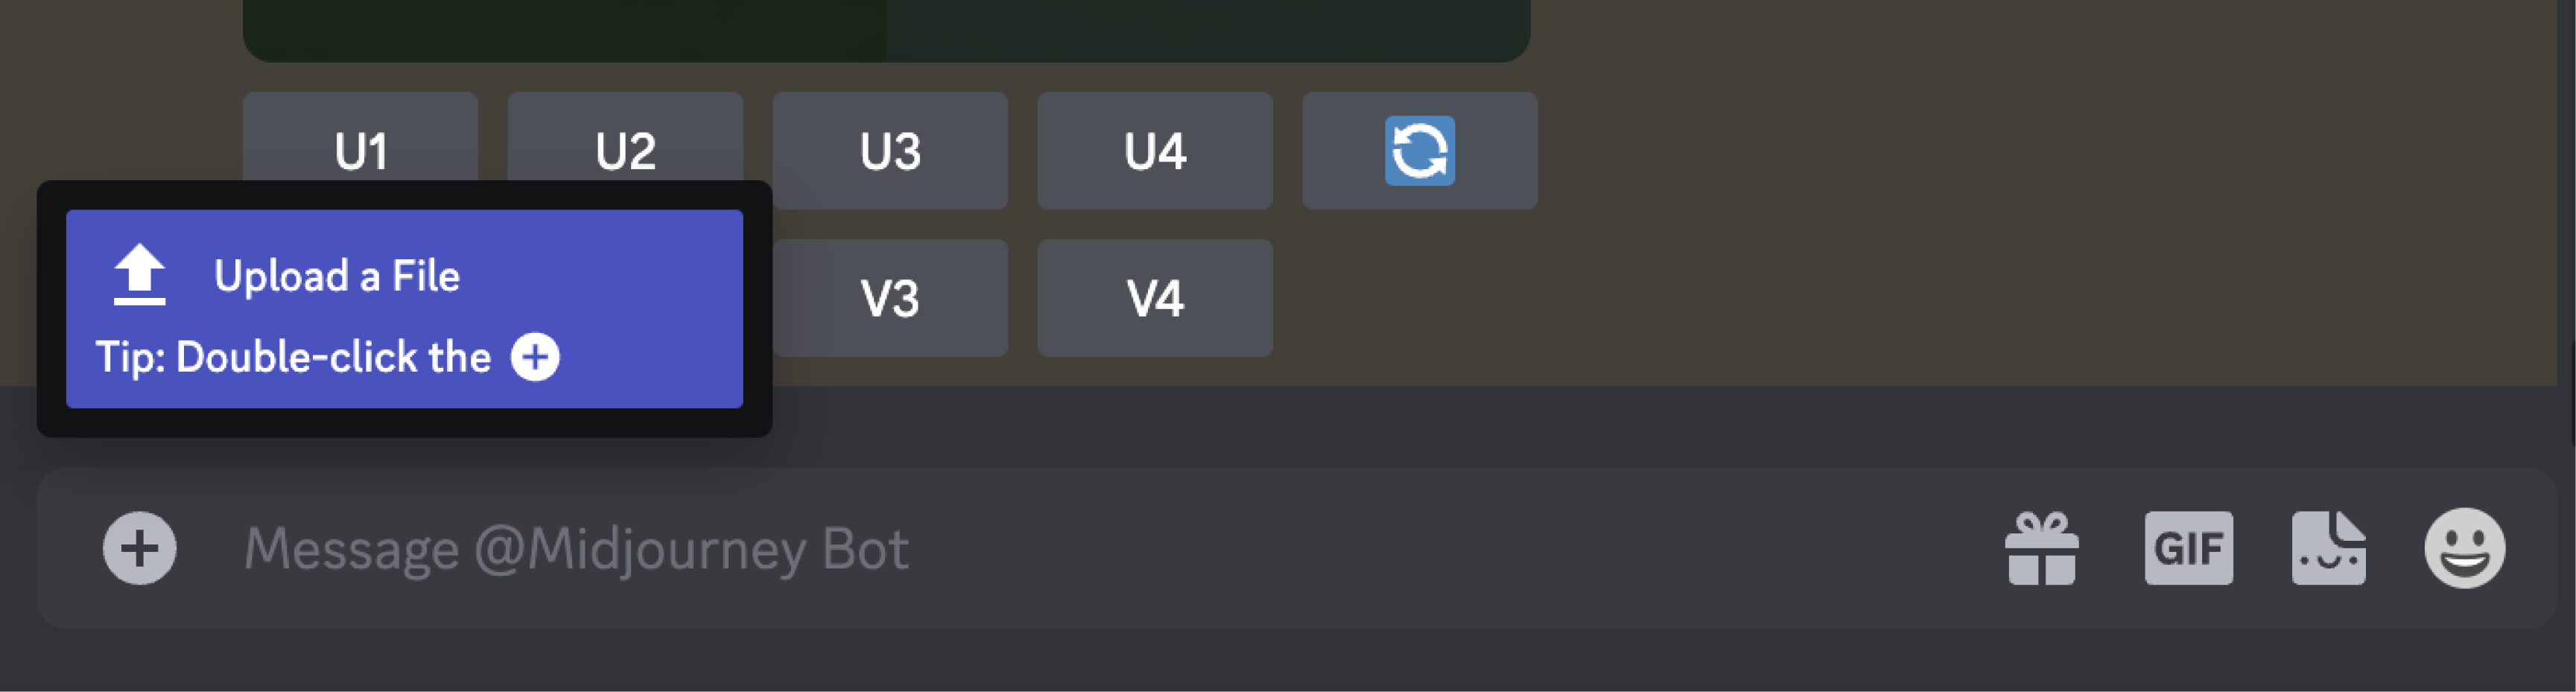
If you want to use a personal image, you can also upload the image in your chat with the Midjourney bot and copy that image link for your prompt.
Step 2: Descriptions
We needed to recreate our thumbnail images for all our previous blog posts. After uploading the original thumbnail photo as a prompt, we also give a description of the image so that Midjourney includes the important elements in the generated image.
Step 3: Genre or style
Next you’ll describe the art style or genre you’d like Midjourney to apply to your image. We went with “hyperrealistic fantasy cyber matrix world”. AI is a great way to experiment and combine styles to create something unique.
4. Colour
The more descriptive, the better. Instead of using basic colour prompts like blue or yellow, try to be more specific when describing your desired colour palette.
A great tool you can use for the colour section of your AI prompt is Coolors. Coolors will give you descriptions for any colour you wish which will help AI generate a more accurate depiction.
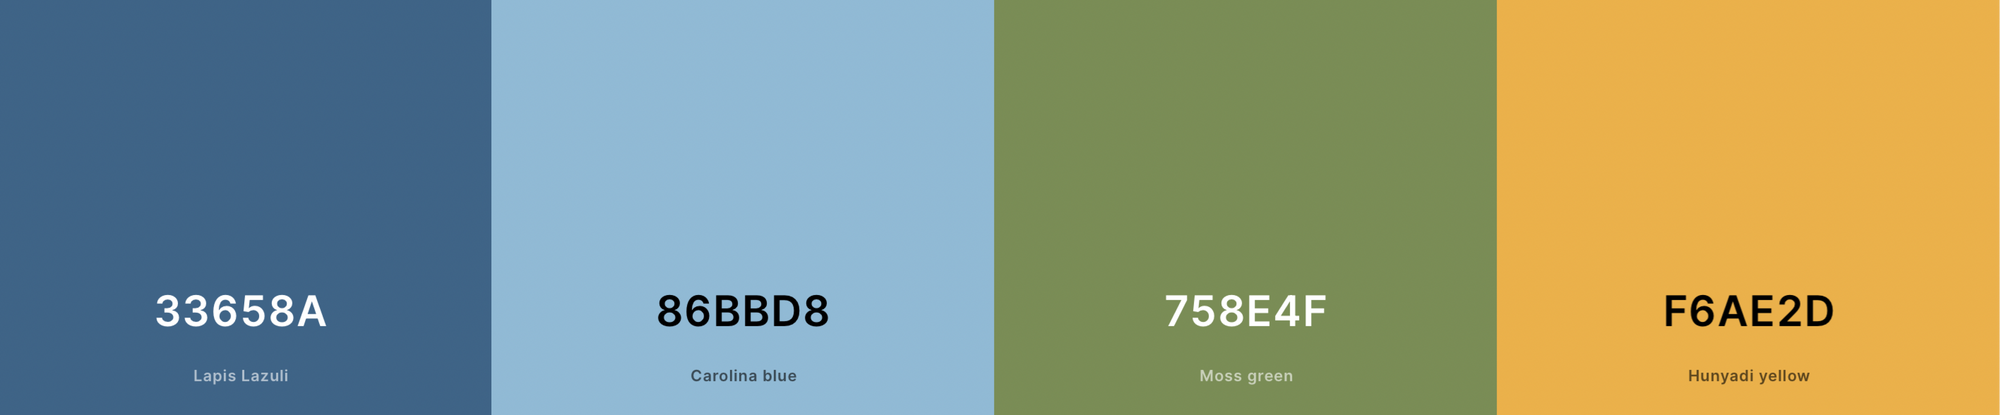
Providing colour descriptions like lapis lazuli, mint green, onyx,
rose quartz, fluorescent cyan, powder blue, and burnt sienna will help AI paint a better picture for you. Ultimately, you can start honing a unique style within AI the more you can control the image output. And part of achieving a recognisable style is generating an accurate, consistent colour palette.

In our case, we wanted to stick to our Retro Rabbit Green. According to Coolors, Retro Rabbit Green is “green-yellow”. But we wanted to be even more specific. Here you’ll need to create your own image in a design software of your choice.
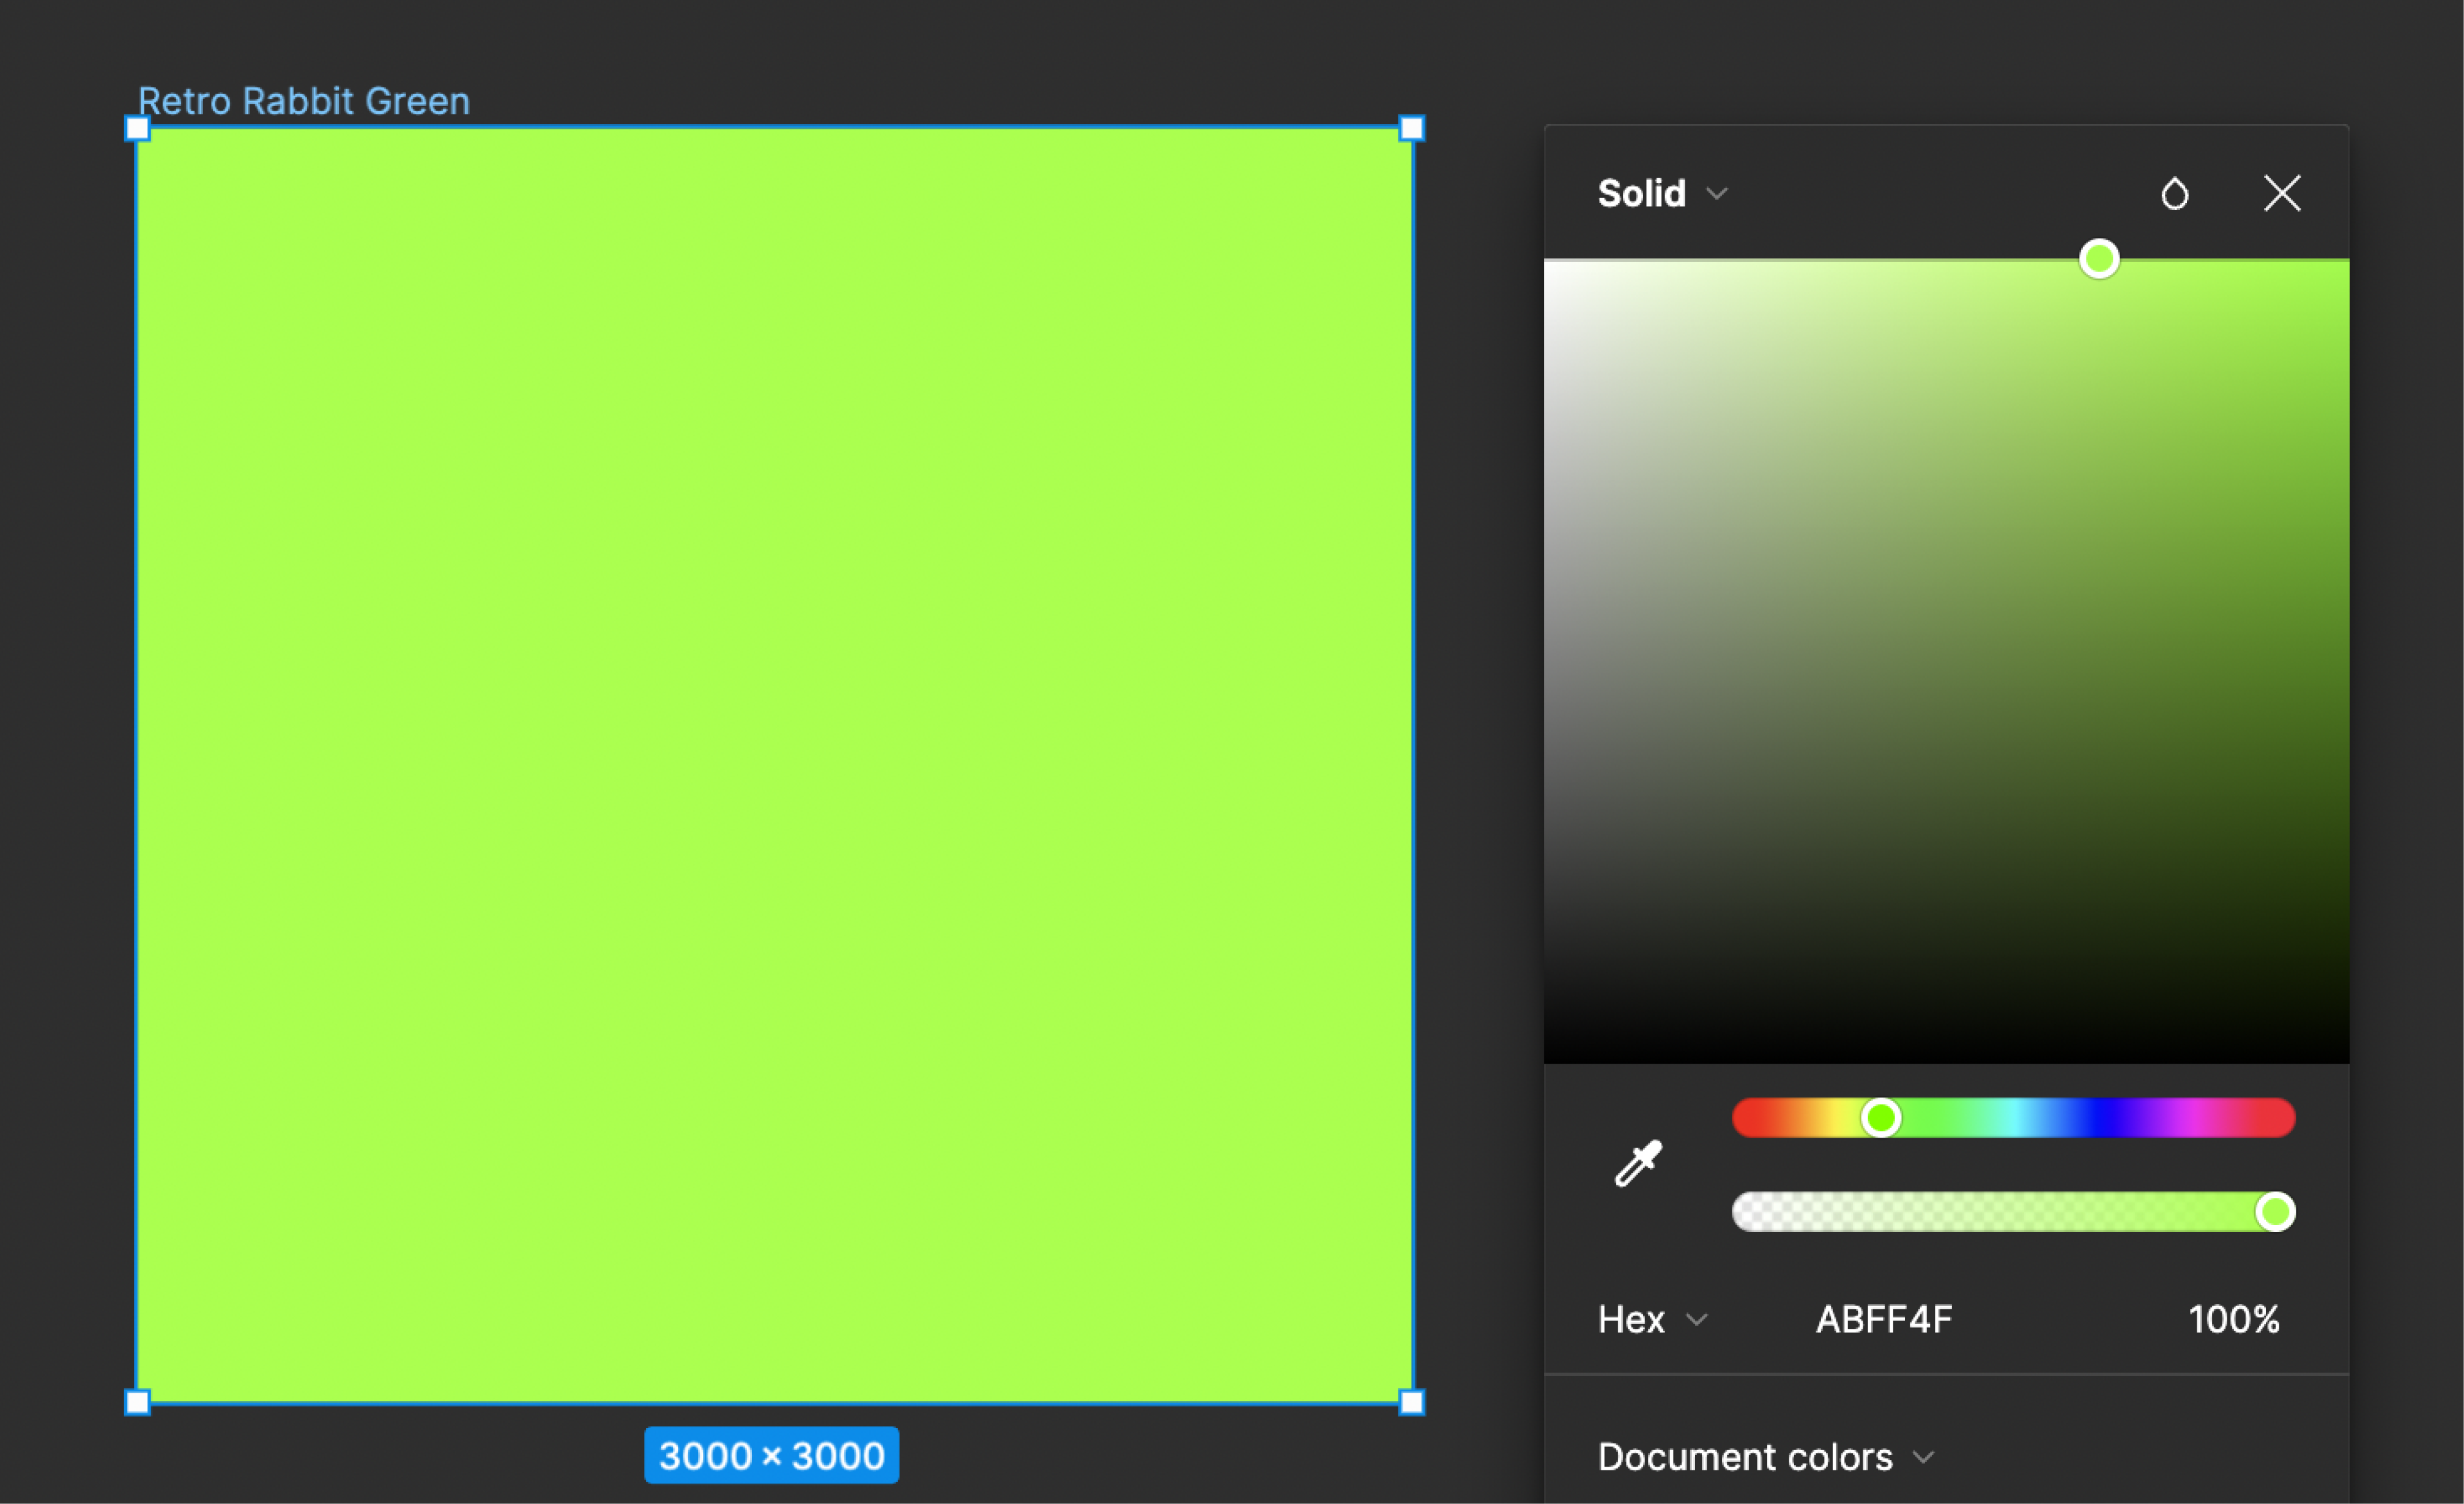
Basically, this is just an solid colour that contains your hex code. We exported it as a jpeg and uploaded it to Midjourney where we copied the image link to include in our prompt. Midjourney will then pick up on this colour, resulting in your images having a more consistent colour palette.
A few extra tips
- Avoid using pixelated photos. If you use a pixelated image as a prompt, you’ll be more likely to receive a pixelated AI image.
- If you’ve already got a consistent image output with your prompt “recipe”, don’t use an illustration as your image prompt. This would help blend styles at the beginning when you’re trying to create something unique but not once you have your style nailed down.
- Chat with Midjourney directly rather than in the channel to avoid your images being lost.
Final Thoughts
Although we couldn't use the AI directly to produce excellent UX, it did help spark more daring ideas for the visual direction we wanted to go in. After the AI exercise, we had quite a few styles to build on, and text-to-image AI was a useful tool during the ideation phase.
At the end of the day, even after improving our prompting skills, we still had to edit our photos with an overlay to create consistency on our website. So that comes to an important point - AI cannot do everything for us, but it can speed up the process and improve our efficiency.
Maryam Omar
Michaela Bramley